Module 17 - Inner Peace, Inner Loop
(Starts a new "MoreDatabase" script)
|
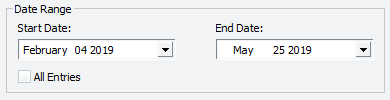
If you're only interested in selected dates, then this can be achieved more easily by specifying the date range on the Custom Scripts Management window. The rows returned in a loop will automatically be filtered to on or within these dates for you, unless you switch on the Ignore date range option, which will negate that filter and just do them all again. |
|
|

You should end up with a list of brothers (assuming you have added their names into the database).
Using Criteria With Loops
The Narrowing criteria box lists the criteria in effect to filter the rows being given to you. Below that are the controls for entering new criteria, or updating them. A fuller explanation of how to use this is given elsewhere in the help.
As an example, we will now modify the LOOP by adding criteria to limit the names listed to just those who are assigned as chairmen:
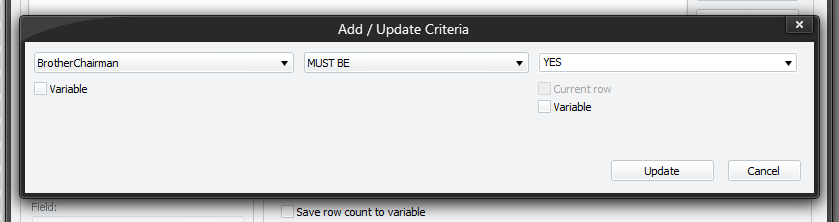
- Choose "BrotherChairman" on the left.
- Choose "MUST BE" in the middle.
- Choose "YES" on the right.
- Click Add New.
|
See how anyone who is not assigned as Chairmen are no longer listed? Any rows where the BrotherChairman field is -1 were eliminated, so you only got given what was left. |

Criteria are a powerful way to get almost exactly what you want, and are quite flexible. More details of how to use the criteria are given elsewhere in the help, so we won't go into too much detail.
Using Loops Within Loops
|
For each row we get (thus, each brother), we want to:
How do we do this? Answer: We insert another loop, but this time it will be nested inside the first one. Thus, this inner loop will be executed for every single row given to us by the outer loop. This will give us a list of items for every chairman; so far, so good. Let's try it. |
|
|
|
|
|
No doubt you have a barrage of dates for each name. But hold on, that's not right? It's blindly printing out all dates on all rows of the Home Talks table regardless of the name. Aha! We need to filter the inner loop by brothers name. |
|
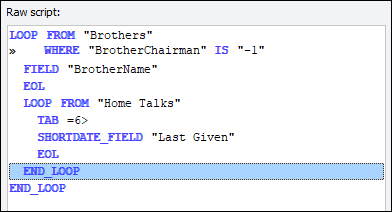
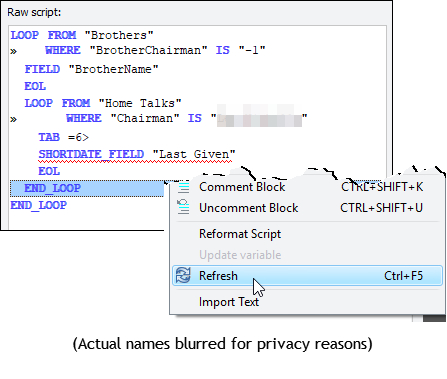
Sometimes you end up seeing commands you have inserted into inner LOOPs with squiggles. Under normal circumstances all you need to do is right-click the script and select Refresh or press <CTRL+F5> Now, if alarm bells haven't already started ringing, you may need to think about that one. From the new output you might realise something is wrong.
Trust me, this is wrong, since it is not what we wanted. |
|
Go back a couple of lines and read how we added the criteria for that inner loop. "... and the first name listed on the output since that's the chairman for the row...". Oh dear. It's the chairman for one of the rows, but we must remember that this inner loop gets executed for every single row given to us by the outer loop. So the chairman name will be changing each time we hit our inner loop - we can't use a literal name, otherwise we'll always be retrieving dates for the same chairman. Cast your mind back to the emphasis we placed on saying the current row in a previous section. This is the key here: we need to use the chairman for the current row as the criteria for this inner loop, to make sure it always narrows the dates down to the right chairman for every new chairman. |
|
Edit the inner LOOP command again:
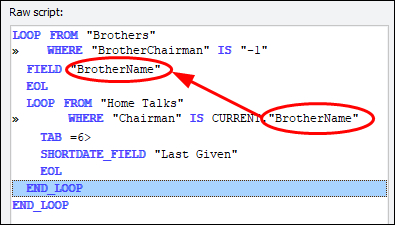
Look at a couple of the controls we haven't mentioned so far: Current row, and Use variables. We are not doing variables here as they are beyond the scope of tutorial 2. There's that word again - 'current'. If you click this option to switch it on, what happens? Our chosen name is replaced by a list, and that list contains fields. But not just any old fields. Compare this list to the one just above it, where we chose "Last Given". It's not the same list. That's because it's the list of fields from the current row of the outer loop. |
|
This changes our saved criteria to use our new information.
|

|
Now, finally, you should see the small list of dates against certain names, and that list of dates should be different for each unique chairman name.
In Conclusion
We do realise that these last couple of sections are quite daunting, and we don't expect you to suddenly be able to create masterpieces. But with a bit of practice, and a certain amount of trial and error, you should be able to gradually figure out what we are talking about, and you will start to benefit from the flexibility this scripting engine provides to customise your reports.
|
|
|
Well done on completing tutorial 2! We hope it has been useful and helped you to get a good grasp on some of the fundamental concepts of scripting and the flexibility that you have at your disposal. Since you have got this far and everything is making good sense to you then... what are you waiting for?! Go and read Tutorial 3 - Advanced Script Features. |