Authorization
To utilize the Google Calendar feature, you’ll need an existing valid Google account. Afterwards, you’ll authorize my application to access your calendars. Typically, this authorization process only needs to be completed once.
 To proceed, ensure that you have internet access. Additionally, if you have a software firewall installed, be prepared to encounter pop-up windows requesting permission to access the internet. Please grant permission when prompted.
The way Google has set up synchronizing to your calendars requires authorization using a mechanism called OAuth2. Please follow these steps:
- Step 1: Authorise
- Step 2: Select Email Account
- Step 3: Consent to agreement
- Step 4: Check Activity
- Step 5: Confirm
Step 1
Press the Authorise button to begin the process:
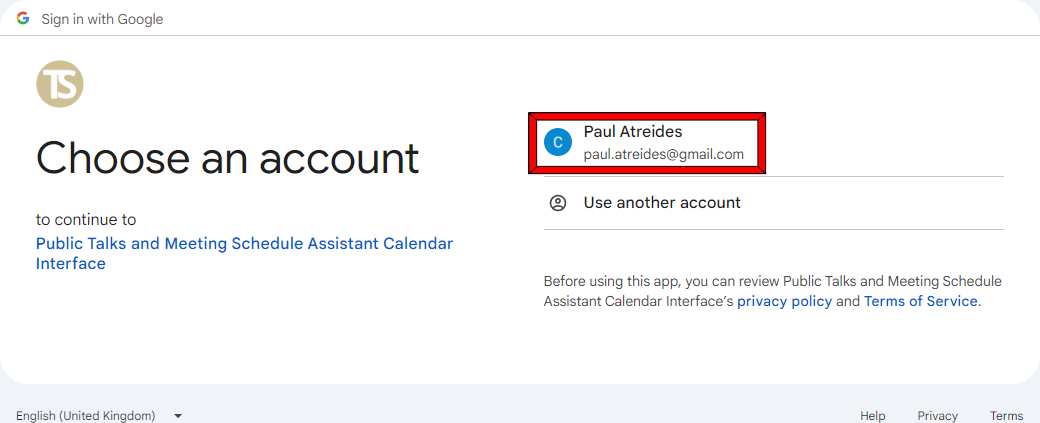
Step 2
You should now see this Choose an account page in your web browser. Select the account that you want to use for calendar synchronization.
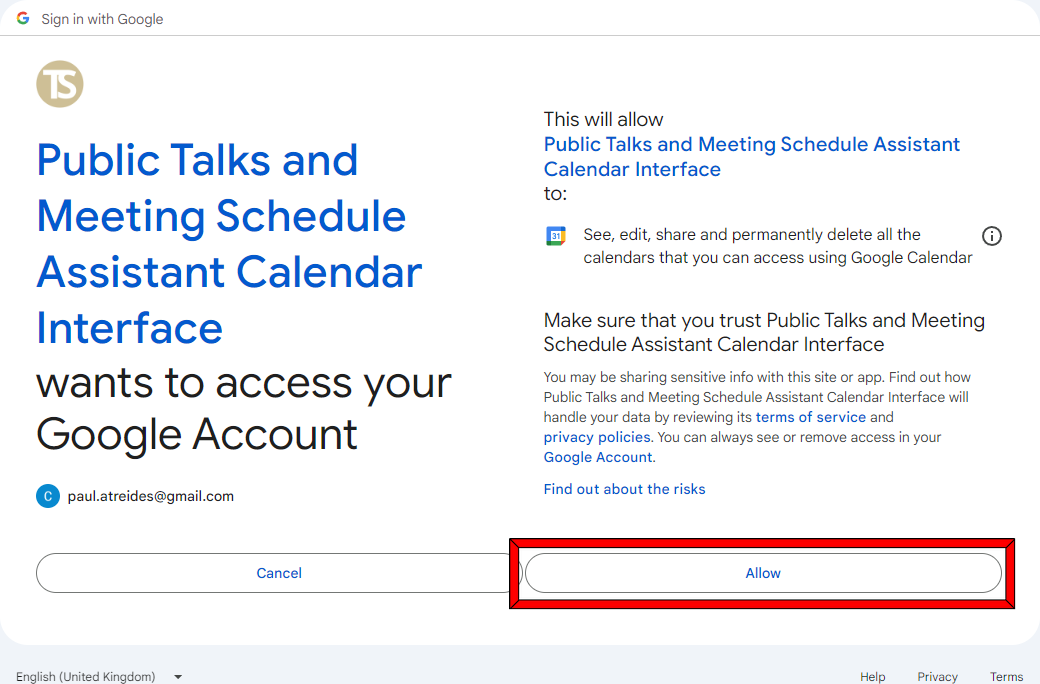
Step 3
This is the consent screen being verified by Google at the moment. Click on Allow:
Step 4
Please follow these steps to review your activity:
- Open your email account.
- Search for an email with the subject related to activity review.
- Click on Check Activity within the email.
- Complete the review as instructed.
Step 5
Meeting Schedule Assistant will now indicate that the authorization process is finished, and you should receive the following message:
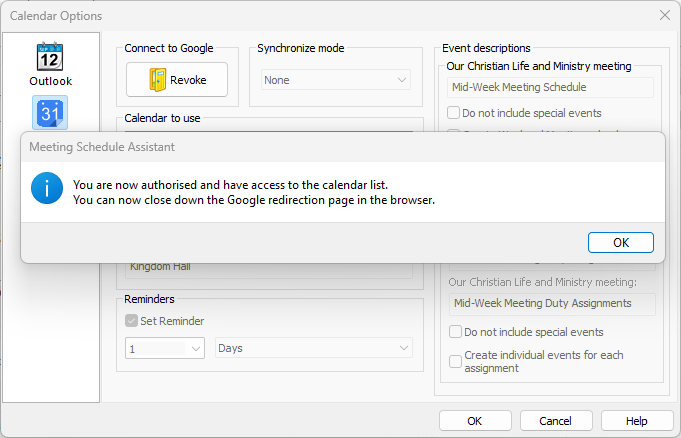
Once the authentication procedure is complete, you will be able to utilize the calendar synchronization features within Meeting Schedule Assistant.
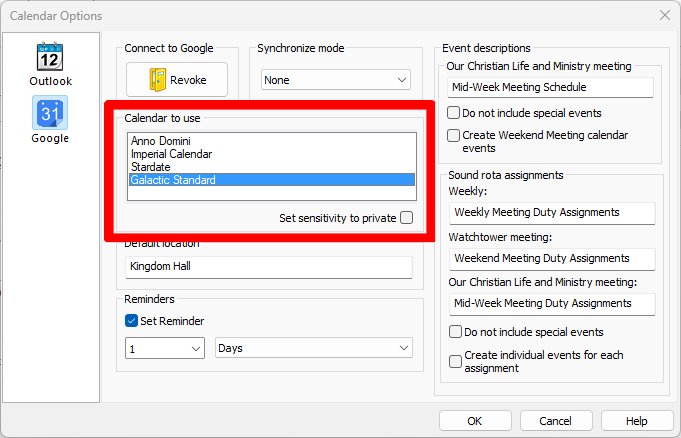
Calendar List
Only calendars that you own (can write to) will be shown in the calendar list. From now on you should not need to authenticate. The rest of the options are all explained in the Google Calendar help topic.
Revoking Access
To revoke authorization at any point in the future all you need to do in this dialogue screen is press CTRL+R. You will need access to the internet and it will remove access from your Google account and reset the calendar list. You can also check the Google pages on this subject https://support.google.com/accounts/answer/3466521, which also provides a direct link to revoke access to applications.
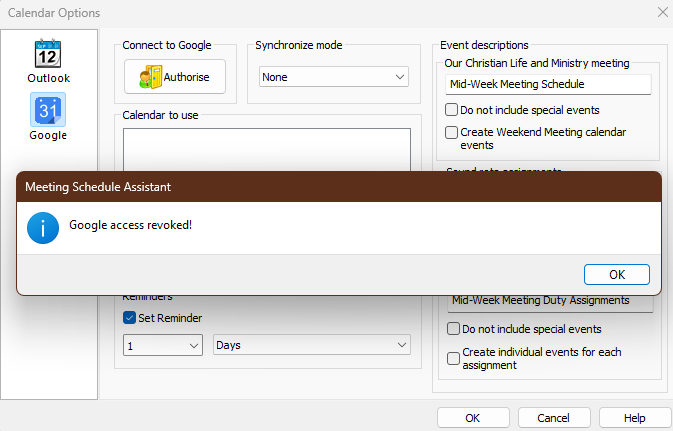
If you get an error message when trying to revoke, then just try authenticating a second time, and then revoking.
This completes the overview of the authorization process and how you manually revoke access.
- Press CTRL+R: To revoke authorization, simply press CTRL+R in this dialogue screen or click the Revoke button.
- Internet Access Required: Ensure you have internet access. The process will remove access from your Google account and reset the calendar list.
- Google Support Page: For additional guidance, you can visit Google’s support page on this topic: https://support.google.com/accounts/answer/3466521. This page also provides a direct link to revoke access.
- Error Message? Try Again: If you encounter an error message during the revocation process, try authenticating a second time and then proceed with revoking.
This concludes the overview of the authorization process and how you can manually revoke access.