Editing Scripts
|
Then, to enable the features of the editor you must either: The title of the script file being edited is displayed in the title bar of the editor. |
Overview
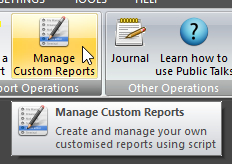
The Custom Script Editor is provided as a way for you to create and modify custom report script files. Such files are needed for you to be able to create your own custom reports.
 There are three tutorials to go along with this help topic. These will help you understand how to write scripts using the editor.
This script editor is page aware. You should set the printer settings before using the editor. It will detect if you are using A4 or LETTER paper sizes and what orientation. If you select any other paper size, it will default to A4. The main thing is to remember to set the paper size to A4 or LETTER and the orientation before invoking the custom script editor. This will ensure that your report displays correctly. It will attempt to use a margin of 1cm all around the page, but this might be larger depending upon your printer's limitations.
You can maximise the editor to take up the full screen. Doing so will give you the widest possible raw script list box to work with. The application will remember whether it was maximized or minimized when last closed, and if neither, remembers its left and top position when last closed. It will come back in this state / position when next opened.
What is a Custom Report Script file?
It is a special file with the file extension .CRS and contains a series of commands. These commands determine not only the look and feel of the custom report, but also the information gets included from the database.
If you can get familiar with the right way of using script files, you should be able to produce virtually any type of custom report that you like. Several custom reports are already provided. Please view these reports as well. Using both the samples and the help topics, you shouldn't have too many problems.
Integrated Development Environment
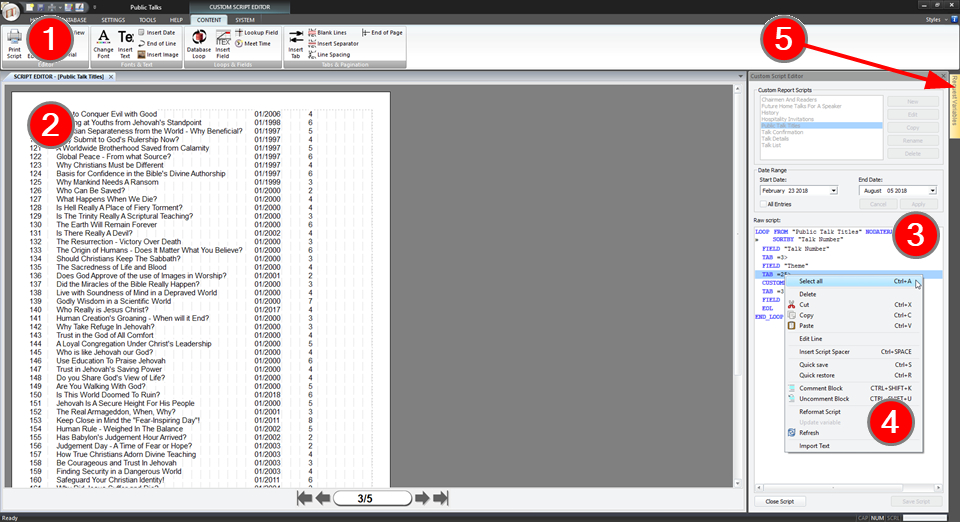
The editor can be logically divided into five separate sections. You can click on the links to jump straight to the section you are interested in.
- Section 1: Ribbon Panels
- Section 2: Page Preview
- Section 3: Raw Script Pane
- Section 4: Context Menu
- Section 5: Request Variables Pane
If you are an advanced user, you may view the Script Command Syntax help topic for further information.
Section 1: Ribbon Panels
Two new ribbon panels appear when you are using the editor. These are:
These panels allows you to add new script commands into the script and update existing ones. Getting familiar with the features of these ribbon panels is advised, as it will save you having to understand the underlying Script Command Syntax.
Click on the links to learn more about each of these panels and how they can be used in the editor.
Section 2: Page Preview
|
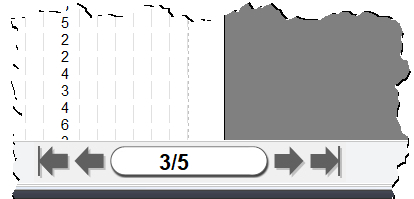
It displays one page at a time. Move to other pages by using the page toolbar which you can see here. As previously mentioned, the page view is based upon the current printer settings. It is important to remember that the information that gets displayed here is determined by the date range settings that were in place at the time you invoked the script editor. So if you expected information to display, and it doesn't, it is quite possible that the date range was not right. To change it, you must click OK (to save script) and change the dates on the Custom Reports maintenance page. |
Section 3: Raw Script Pane
|
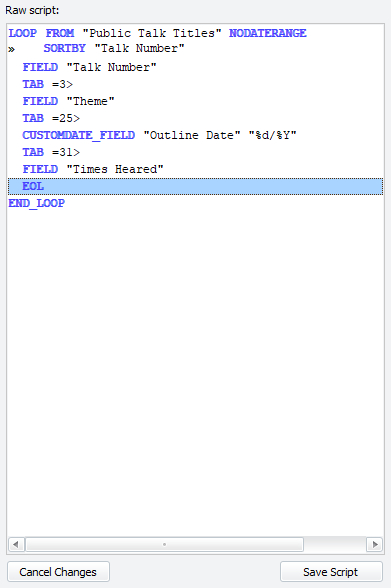
It uses syntax highlighting (colours can be personalised to your taste) to clearly show you what are: Such colour highlighting should aid you in understanding your script and identifying errors (see next section for more information about identifying errors).
Any lines of text in the list box that are not displayed completely (because they are longer than the width of the pane) will display in their entirety as a tooltip if you hover the mouse over the line of text. This saves you having to use the horizontal scroll bar to scroll left and right to view the rest of the text. Adding Commands To add a new command into the script list box, either use the features of the ribbon panels or paste the text in from the clipboard (yes, you can create the script file in your own editor and paste it in - but for this to work you must ensure the Script Command Syntax is valid). Place the solid cursor (blue on this screenshot) at the location where you want the new command to be inserted. The next command inserted will push the selected line down, and thus goes before that line. Editing Commands To modify a command, just double click it and make the changes in the control panel. Or right-click and select Edit Line from the context menu. Deleting Command To delete one or more commands from the pane, use standard window selection methods and press the delete key. Or right-click the selected lines and select Delete from the context menu. Cancel Changes Press this button if you want to cancel all the changes you have made and close the script file. Save Script Press this button to save the current script to your hard disk drive.
|


Section 4: Context Menu
This handy context menu gives you access to several additional features which you will not find on the Custom Script Editor ribbon panels. Display it by right-clicking the Raw script list area of the editor.
Section 5: Request Variables Pane
|
If you have any variables referenced in your script within the editor, it will show the Required Variables window until you have set all the values. Also, if you add a new REQUIRES command to the script, it will do the same. All of the prompts that you have assigned to variables are shown in a list. Just select the prompt and then use the edit box or drop-down list to update the information for the variable. |

Note that this panel can be permanently pinned so that it is always visible. Just click on the small pin at the top right to toggle this feature.
Update
Press the Update button after you have specified all variables to commit the change(s) into the editor.
Remember that AwaySpeaker and Congregation are special variables. These will present a drop-down list of data for you to select an appropriate value from. Otherwise you can enter the text directly. In addition, any variable that you supplied default options for, will show them in the drop-down list too.
To use the variable in your script, you must place a $ before the variable name. Several of the sample scripts included use variables. These should give you a good idea on how to use them effectively.
For detailed information about using variables in your script file, look up the script command syntax for the TEXT command.