Google Email Authorization
⚠️ Important: If you are using a Google Email address then you must read this section. Otherwise, you will not be able to use the email facilities within Meeting Schedule Assistant.
Google requires applications to send email using an authorization method called OAuth2, which allows Meeting Schedule Assistant to send messages securely on your behalf. Please follow these steps:
- Step 1: Connect to Google
- Step 2: Authorise
- Step 3: Select Email Account
- Step 4: Consent to agreement
- Step 5: Close browser
- Step 6: Confirm
- Step 7: Provide your name and email address
- Step 8: Test email settings
Step 1
Locate the Connect to Google check box and set it. Now the Authorise button will become active.
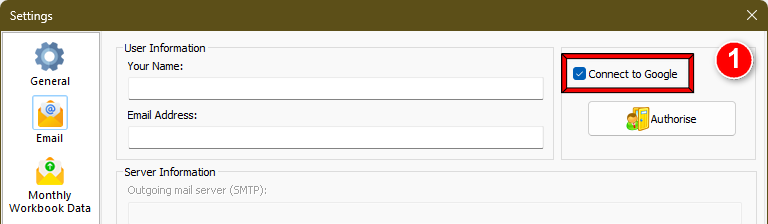
Figure 133. Step 1: Connect to Google.
Step 2
Now press the Authorise button to begin the process:
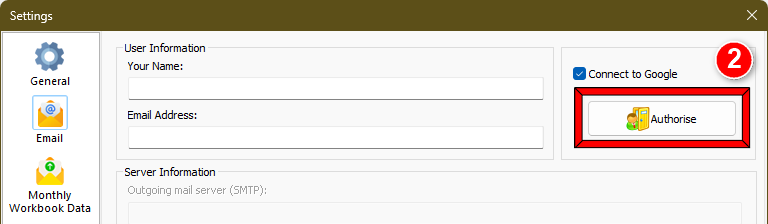
Figure 134. Step 2: Authorise.
Step 3
You should now see this Choose an account page in your web browser. Select the account that you want to use for sending the monthly data emails.
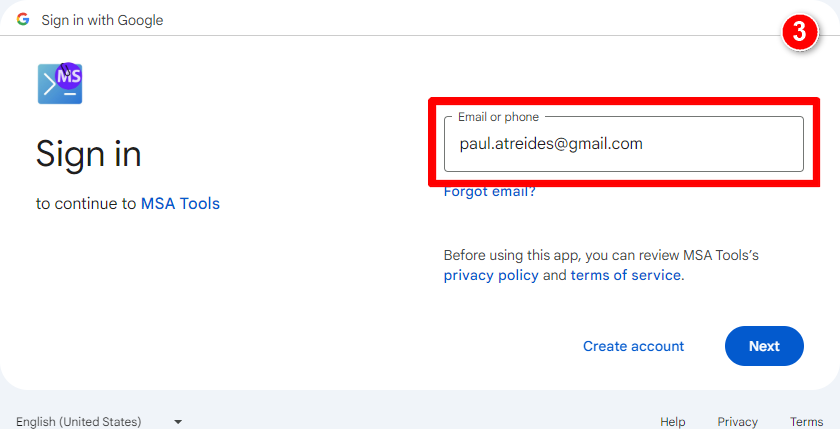
Figure 135. Step 3: Choose an account.
Step 4
This is the consent screen being verified by Google at the moment. Click on Continue:
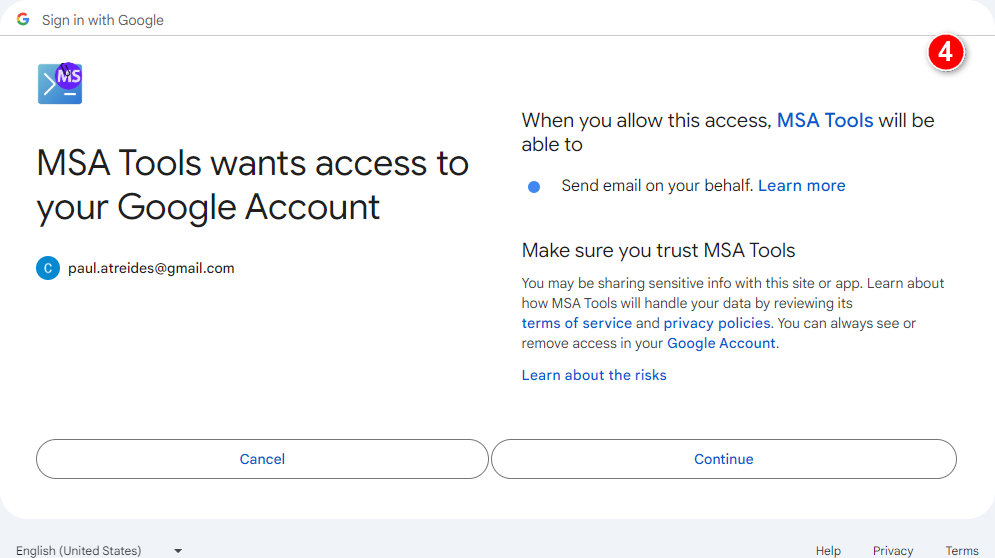
Figure 136. Step 4: Consent to agreement.
Step 5
You should see this message in the browser now. Follow the instruction and close the window.

Figure 137. Step 5: Close browser.
Step 6
You should now see this confirmation message. Click OK:

Figure 138. Step 6: Confirmation popup.
Step 7
ℹ️ You will now see that the button has changed to Revoke. Click this button if you ever want to remove the connection with Google.
For now, type in your name and gmail email address:
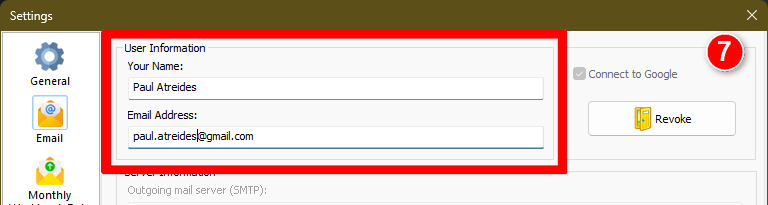
Figure 139. Step 7: Provide your name and email address.
Step 8
Finally, click Test Account Settings to send yourself a test email message.
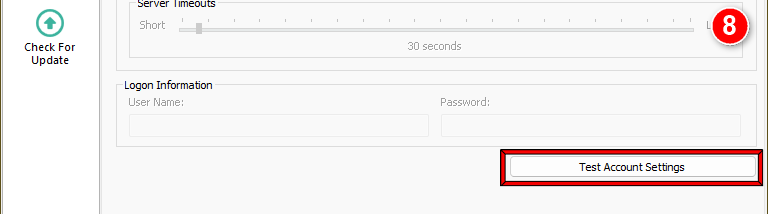
Figure 140. Step 8: Test account settings.
Once the authorization process is complete, you can begin using the email features within Meeting Schedule Assistant.
Navigation
- Parent topic: Email