Weekend Meeting Worksheet
- Start the Meeting Editor by creating a new schedule or opening an existing one.
- Select the Worksheet tab.
- Select "Worksheet-S-140-Weekend Meeting" from the Styles list.

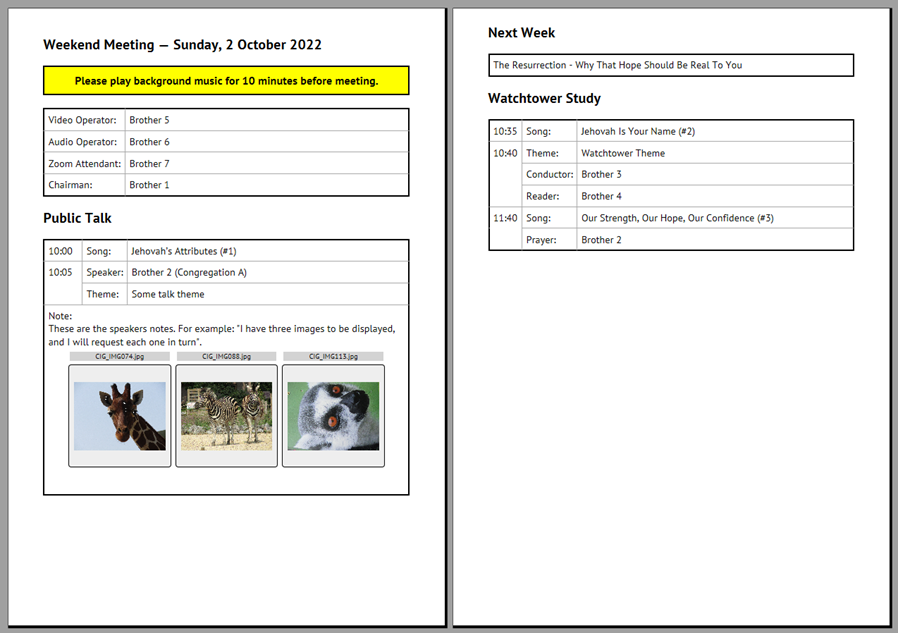
This is an example of what the Weekend Worksheet looks like when you use Print Preview in the Meeting Editor:
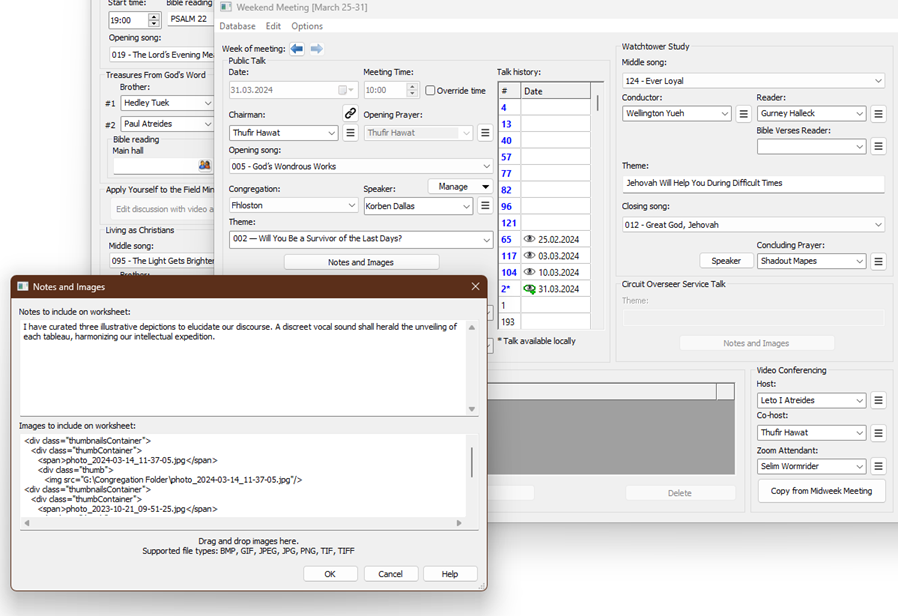
The Weekend Meeting window was set up like this for the above worksheet to be displayed:
Preparing the Worksheet Worksheet is self-explanatory with the exception of the images.
Adding Images to the Worksheet
It is very easy to add images to the worksheet. It is as simple as dragging and dropping the images from File Explorer onto the Notes and Images pop-up window:
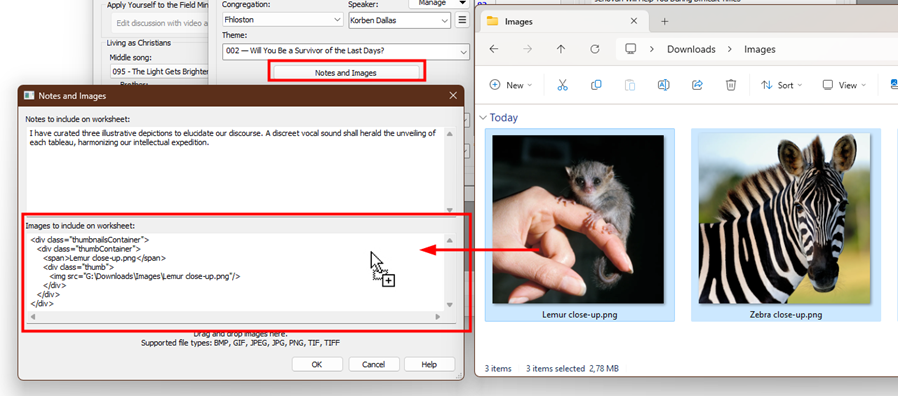
As mentioned on the window, you can drag and drop the following types of images onto the window:
- BMP
- GIF
- JPG, JPEG
- PNG
- TIF, TIFF
 Don't worry if you select other types of files at the same time. They will be ignored.
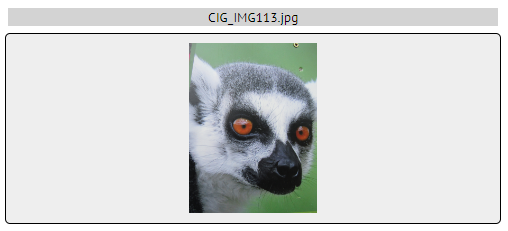
Image Orientation
You may have noticed a difference in image orientation in the above snapshots:

This happens for two related reasons:
- The image was taken with a digital camera and uses EXIF Orientation information in the photo.
- The Meeting Editor internal preview can't cater for EXIF Orientation because it uses older web browser technology under the hood (specifically Internet Explorer version 7).
But, don't worry if this happens, because you can use the Preview in Browser feature to display the worksheet in a modern browser, like Microsoft Edge, and all will be fine:
Advanced Customization
Find out more about advanced customization.