
Congregation Manager
The Congregation Manager provides a central place to maintain all congregation details used throughout Meeting Schedule Assistant.
The window is divided into two main areas:
- Congregation List — Displays all congregations in the database and lets you select, add, or remove congregations.
- Details — Displays and lets you edit information for the selected congregation, including meeting times, talk coordinator, hyperlinks, notes, and speakers.
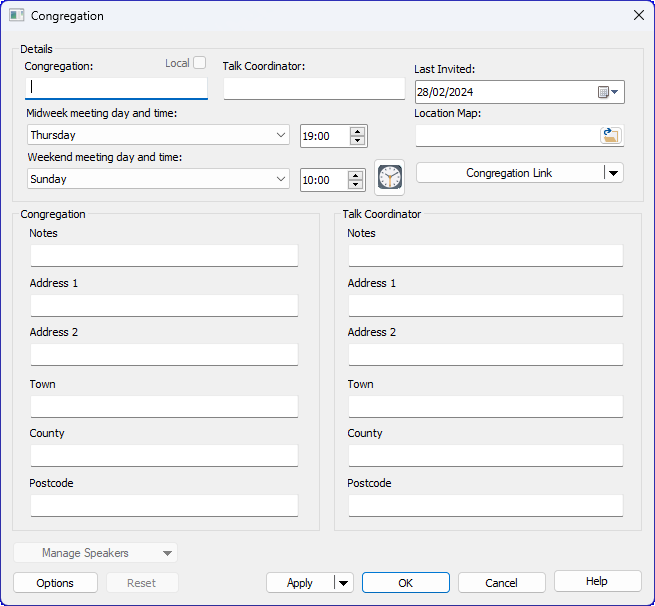
Figure 37. Congregation Manager window
ℹ️ Note: You must supply at least the congregation name for it to be added to the database.
How to Access
You can open the Congregation Manager by either:
- Selecting Database > Congregations > Manage.
- Clicking the Congregation Manager button on the toolbar.
Congregation List
The Congregation List on the left shows all congregations stored in your database. Selecting a congregation updates the details panel on the right, where you can review and edit its information. Use the buttons below the list to add or remove congregations.
Details
The Details panel shows all stored information for the selected congregation. Here you can update congregation details, meeting times, history, hyperlinks, and notes.
Congregation
Enter the name for the congregation.
Local
Set this option if the selected congregation is your local congregation. Only one congregation can be marked as local.
⚠️ Note: Setting this option correctly is important, as it is used to populate the list of Away Speakers on the Weekend Meeting Editor window.
Talk Coordinator
Enter the name of the congregation’s Public Talk Coordinator.
Meeting Day and Time
Select the congregation’s meeting days and start times. Times are entered in 24‑hour format. If the congregation's weekend meeting time changes annually, use the Time Changes Manager. The weekend time field is disabled while Time Changes are enabled.
Last Invited
Shows the date when a speaker from this congregation last gave a talk in your Kingdom Hall. This date is updated automatically when you record an exchange. Ensure your Assignment History is kept up to date when saving Meeting Editor schedules.
Location Map
Use this menu button to manage the hyperlink associated with the congregation’s location. You can add, edit, or delete the link. Selecting Add Hyperlink opens the Hyperlinks window.
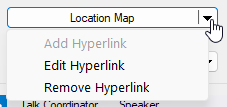
Figure 38. Location Map menu button
Once a hyperlink has been added, clicking the button opens the linked location.
See also: Hyperlinks
Congregation Link
Use this menu button to manage a general congregation hyperlink. You can add, edit, or delete the link. Selecting Add Hyperlink opens the Hyperlinks window.
Once a hyperlink has been added, clicking the button opens the linked location.
See also: Hyperlinks
Notes and Memo Information
You can use the notes and memo fields to record any additional information about the congregation or the talk coordinator.
The descriptive labels used for these fields may vary depending on your configuration. You can customise them in the database Options.
Window Actions
Use the buttons at the bottom of the window to manage your changes:
- Apply Changes — Saves updates to the database. You must apply your changes before adding or editing speakers.
- Cancel Changes — Reverts all unsaved edits since the last save.
- Close — Closes the window and prompts you to save any pending changes.
- Options — Opens the database Options window, where you can customise various application settings.
Supporting Tools
Managing Speakers
Use the Speakers panel to add, edit, or remove public talk Speaker for the selected congregation.

You can move a speaker from one congregation to another within the database. When you do this, the Choose Congregation window is displayed, allowing you to select the target congregation. All of the speaker's assigned talk numbers are transferred automatically.
Note:
- A speaker with the same name cannot already exist in the target congregation.
- This option is disabled if you have unsaved changes. Click Apply Changes before transferring a speaker.
View Menu —Report Viewer
You can open the Report Viewer from the View menu on this window. The Report Viewer lets you generate, preview, print, and export reports.
See also: Report Viewer
Search (Find)
Use Find to search within the current database window.
For full search instructions, see Finding Entries.
Navigation
- Parent topic: Congregations
- Next topic: Export