Memorial
The Memorial window is available from the Special Events Manager.
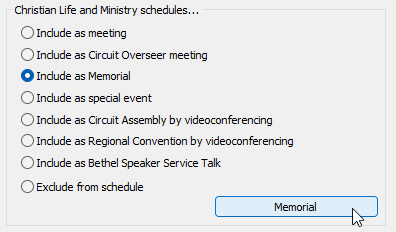
You must specify the Memorial special event for this button to be enabled.
You can also access this window from within the Meeting Editor via the Special Events context menu.
Overview
We look forward to commemorating the death of Jesus every year. Use this window to manage all the information for this special event.
Sample Schedule
Here is an example of how these events look like on the schedule when you use any of the Workbook-S-140 templates (supplied with the installer).

Feel free to copy the supplied templates and adjust the look and feel as required to suit your taste. Information about customization can be found at the end of this help topic.
Configuration
There are several things that you can specify for the Memorial event:
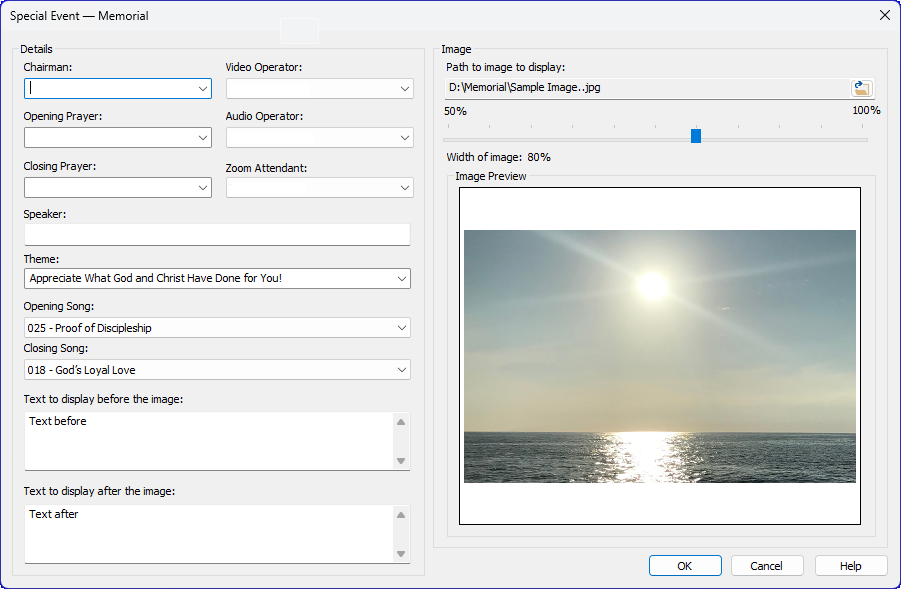
Step 1 — Assignments
|
Select who is to be assigned at the Chairman for this special event. The list will include all the same names as the Chairman assignment on the Managing Weekend Meeting Information window. See the note below about dynamic lists. |
|
|
Select who is to be assigned at the Opening Prayer for this special event. The list will include all the same names as the Opening Prayer assignment on the Managing Weekend Meeting Information window. See the note below about dynamic lists. |
|
|
Select who is to be assigned at the Closing Prayer for this special event. The list will include all the same names as the Closing Prayer assignment on the Managing Weekend Meeting Information window. See the note below about dynamic lists. |
|
|
Select who is to be assigned as the Host for this special event. The list will include all those with the Host assignment in the Publishers Database. |
|
|
Select who is to be assigned as the Co-host for this special event. The list will include all those with the Co-host assignment in the Publishers Database. |
|
|
Select who is to be assigned as the Zoom Attendant for this special event. The list will include all those with the Zoom Attendant assignment in the Publishers Database. |
Step 2 — Memorial
|
Enter the name of the brother who will be handling the Memorial commemoration. |
|
|
Select the theme of the Memorial outline from the drop-down list or type in the text.
|
|
|
Use the dropdown list to specify the opening song. Note that you can type the first 3 digits to quickly jump to the song in the list. E.g: 001, 010, 100.
|
|
|
Use the dropdown list to specify the closing song. Note that you can type the first 3 digits to quickly jump to the song in the list. E.g: 001, 010, 100.
|
Step 3 — Text Before Image

You can type in some text that you would like to appear before the image on the schedule The default wording is:
Please now watch the following video from JW Stream:
But you can use whatever text you like.
 You can insert a new line (in either of the text boxes) by using CTRL + ENTER.
Step 4 — Text After Image

You can likewise provide multiline text that is displayed after the image on the schedule. The default wording is:
Please conclude with a prayer.
The template that has been provided will display this text after the Description of the special event. The Description is maintained on the Special Events Manager.
Step 5 — Image Details
Click on the Browse button to select a suitable image to display on the schedule. Support is provided for all popular image types (BMP, GIF, JPG, PNG, TIF).
Where can you find a suitable image? One thing you can do is navigate to the JW.ORG website and locate the program for the Memorial. Usually this page will have a graphic at the top. You can save that graphic to your PC and select it.
We do not intend to provide any tools to automatically download the images. This is because they are copyrighted material and software should not "scrape" data from the website. So obtaining the image is something you must do manually.
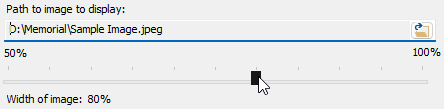
A slider has been provided for you to specify the width of the image on the schedule. You can select a percentage within the range 50% - 100% and the default is 80% which gives a nice margin on either side. You can adjust the template script if you desire a percentage outside of this range.
The image is displayed from the path you select. So if you delete the image, rename it or move it, it will no longer be visible on the schedule.
Editing from within Meeting Editor
As already mentioned, it is possible to manage the Memorial details from within the Meeting Editor.
Click the Calendar button to display the context menu and select Edit Memorial Info from the menu.
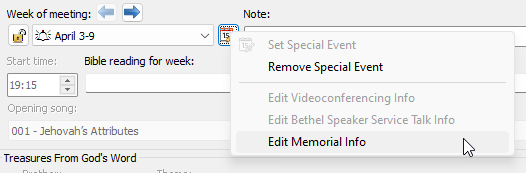
This makes it a bit easier for fine-tuning how the image and text will display as you will seen your changes straight-away.
Customization
Read this help topic if you are interested in changing the look and feel of how the Memorial event is displayed on your schedules. Only perform this kind of advanced customization if you are happy working with the underlying template files.