Settings
Adjust the way the Auto Assign tool works by selecting Settings on the Auto Assign menu.
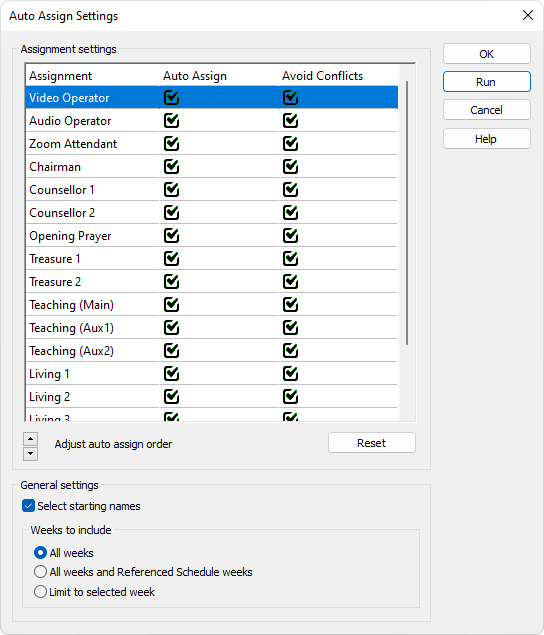
 Learn more about the Auto Assign Settings window by looking through the rest of this help topic. Or, as an alternative, click on the item you are interested in on the screenshot above.
Overview
Use the various settings on this window to control how the Auto Assign tool will behave when updating your schedule.
The settings are split into two categories:
Using the Run button will save the current settings, close the window and automatically start the operation.
Assignment Settings
You can fine-tune how the system will work for each specific assignment:
|
Use the up / down controls to change the order of priority. The auto assign tool with work it's way through the assignments in the order you specify.
|
|
|
Switch this option off if you want to exclude the assignment during the auto assign operation.
|
|
|
Switch on this option if you would like to avoid using the same publisher multiple times during the same meeting.
|
Use the Reset button to quickly revert to the default settings.
General Settings
- Select Starting Names
Switch this setting on display the Select Starting Names window at the beginning of the Auto Assign process. Click the link to find out more. - Weeks to include
Choose the appropriate option to control which meeting weeks are processed.
Any week that is locked will be ignored.